Have you been looking for ways to move your prospects down the marketing funnel?
You could have a lot of views on your website but just not enough conversions.
Or maybe you just don’t have enough qualified leads and are looking for ways to get more.
HubSpot Workflows can make your marketing, sales, and service processes much smoother and faster, helping to fill the funnel.
Here are just a few scenarios where the Workflows would come in handy in sales and marketing:
- Email drip campaigns. You can automate your email drip campaigns starting with a lead magnet that triggers the email sequences.
- Webinar registration. A HubSpot Workflow can let you automate the registration of webinar attendees. Your registrants don’t need to go to a different website to register after filling out a form from your landing page, moving seamlessly to the next part of the process.
- Unenroll people from different Workflows as they move down the marketing funnel. Automatically promote people when they move through your funnel from awareness and consideration to potential conversion. The Workflow can present the right content and message to your prospects to reflect their needs.
- Set up after sales Workflows that give your clients a great after sales experience to strengthen the relationship. Keep your clients informed with follow up emails, post-purchase freebies, and important information.
These are just a few common ways that a HubSpot Workflow can make your work more manageable while also giving your audience a much better experience.
But to get the most out of it, you need to know and understand its settings.
This article will be looking at Workflow settings and how they work. We’ll also add some tips to help you avoid mistakes that may cost you conversions.
PS: If you already know how to create a Workflow, feel free to scroll to the ‘Workflow Settings’ title so you can get some helpful tips.
We’ll start with the basics.
Creating a Workflow
Follow these quick steps to set up your first Workflow:
1. On your HubSpot page, go to ‘Automation > Workflows.’
2. Click on the ‘Create Workflow’ button.
3. Pick ‘Contact-based’ from the list that appears on the left.
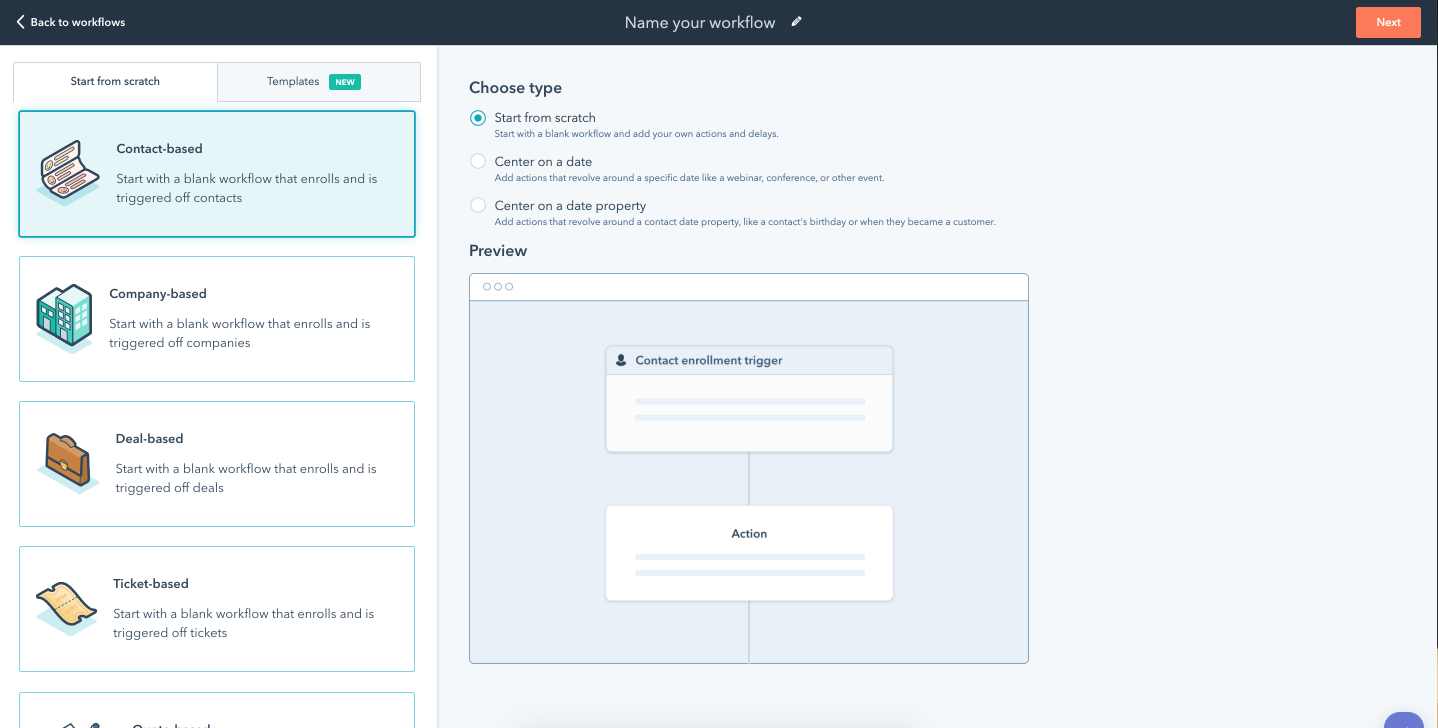
4. Name your Workflow by clicking on the little pencil icon at the top and typing in a name.
5. Select the ‘Start from Scratch’ option.
6. Click on the ‘Create’ button at the top right.
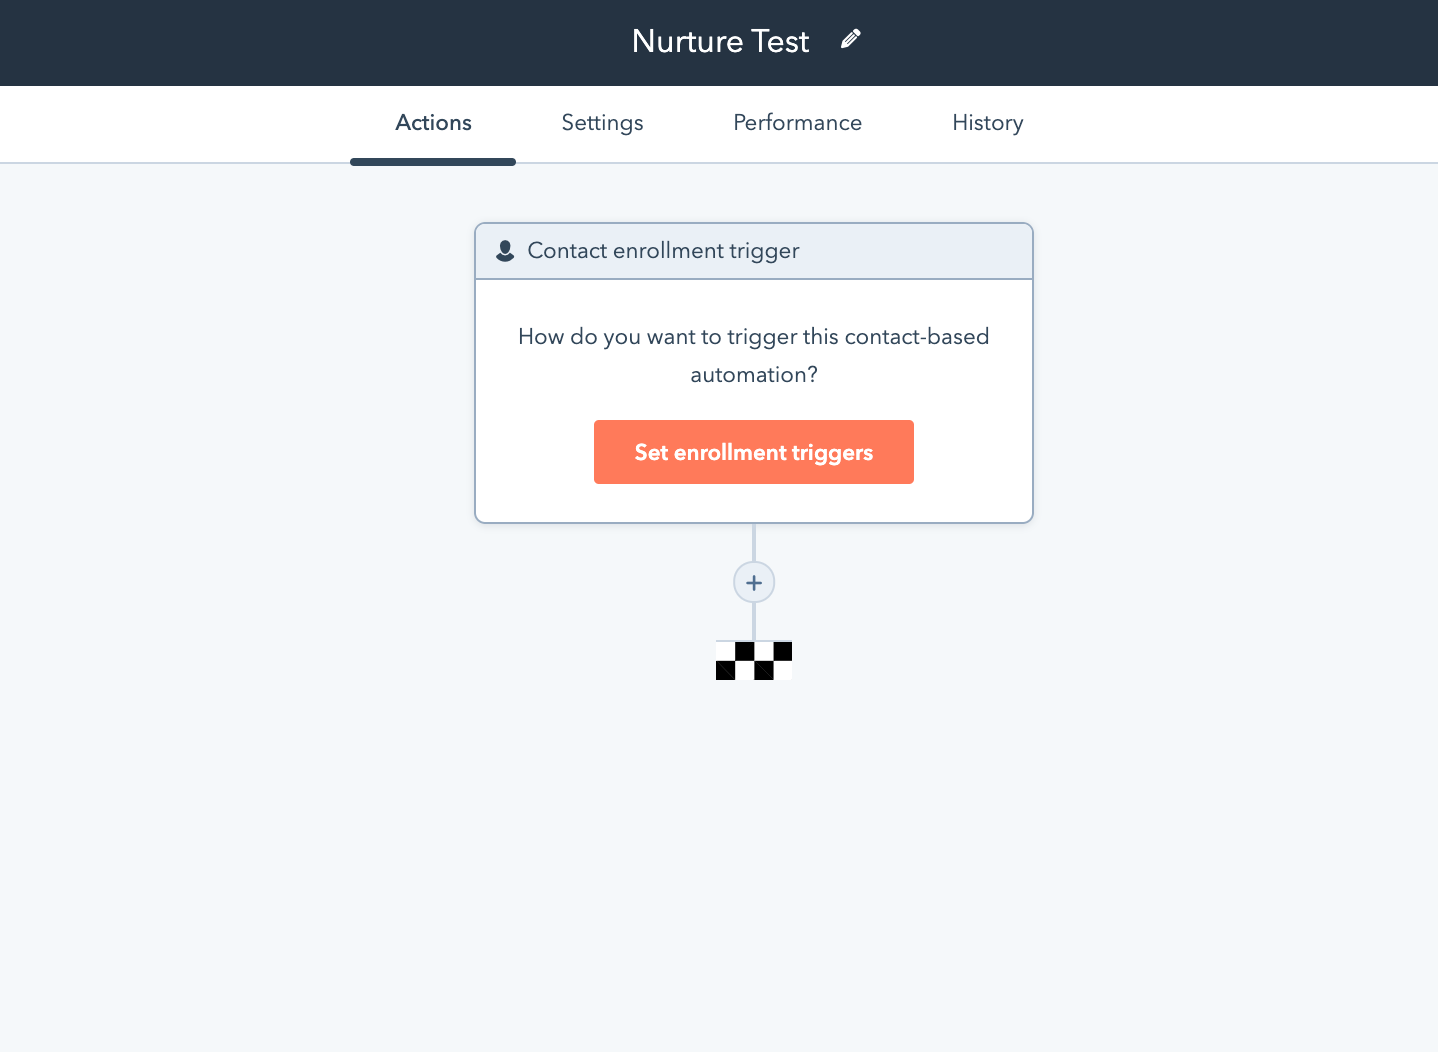
Setting Enrollment Triggers
Enrollment triggers are the actions from a user that will trigger events such as an email sequence or an auto-registration for a webinar.
That is the first thing that you set up on a Workflow.
1. Click on the ‘Set Enrollment Trigger’ button.
2. Then pick a trigger from the drop-down list on the right.
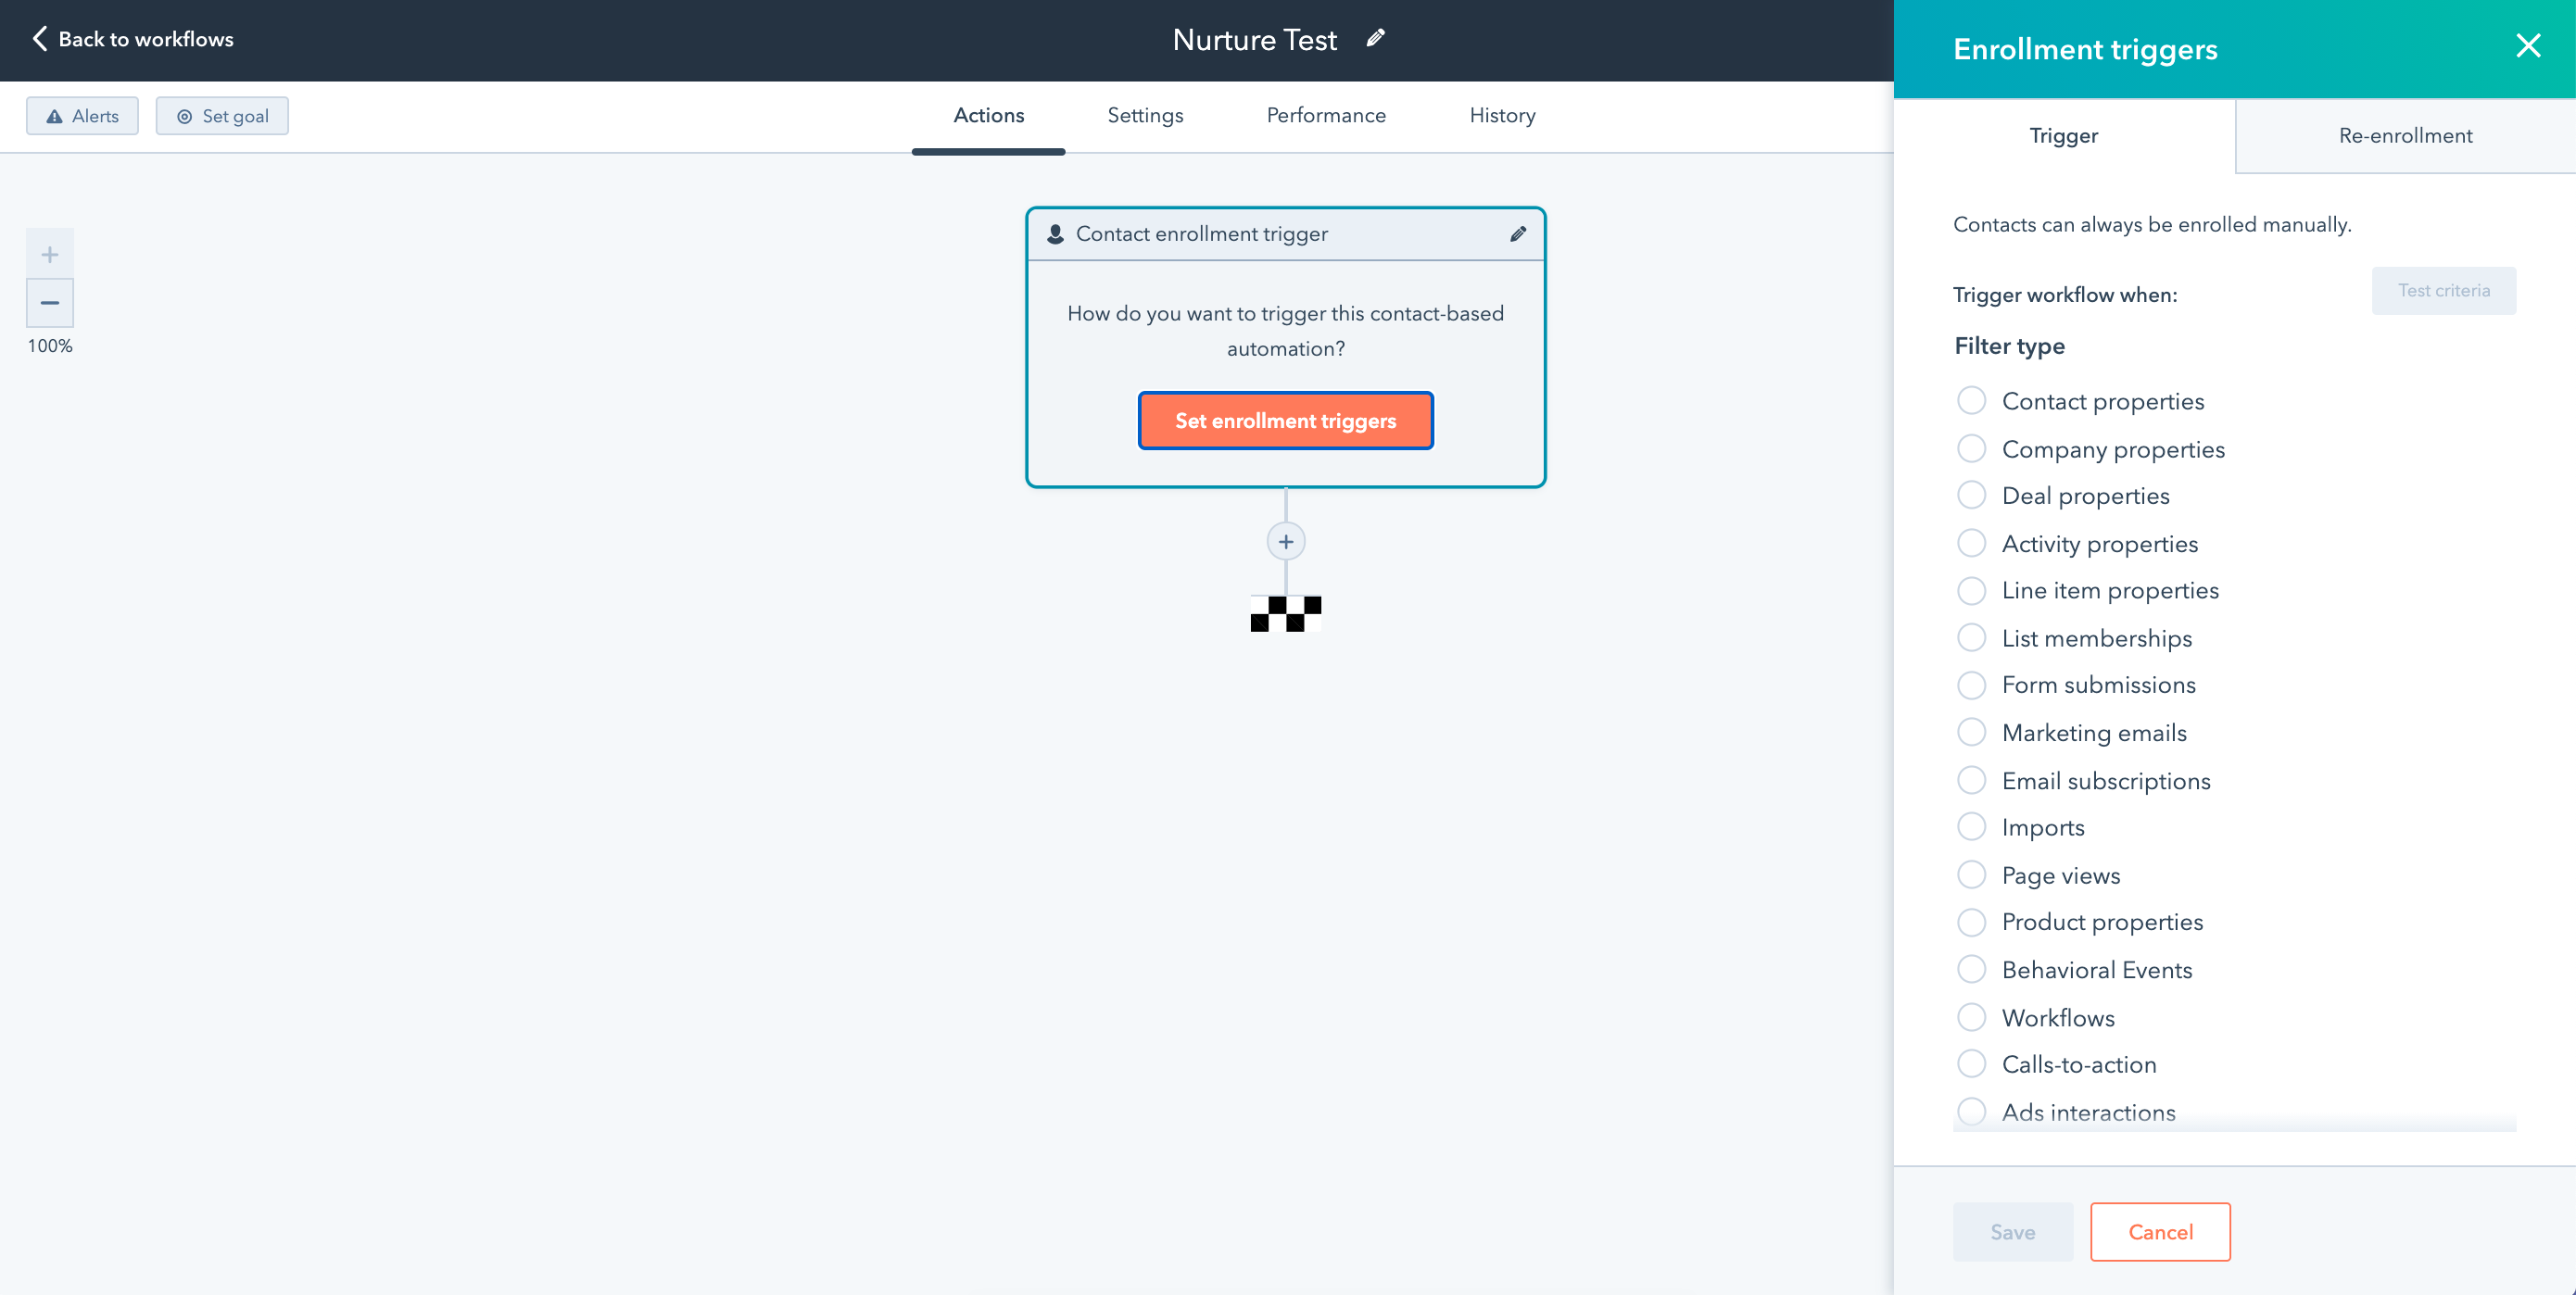
For instance, you may have a form that captures people’s contacts in exchange for an ebook or access to a webinar. You can pick this as your enrollment trigger. It would trigger a set of emails, or a registration.
Once you’ve picked this, you can move to adding the sequence of events, like drip emails.
And that is it! You have your first Workflow set up.
Now let’s look at some Workflow settings.
Workflow Settings
Once you’ve created your Workflow, head over to ‘Settings’ to make sure you have set it up correctly.
Here, you’ll get the General Settings and the Unenrollment and Suppression Settings.
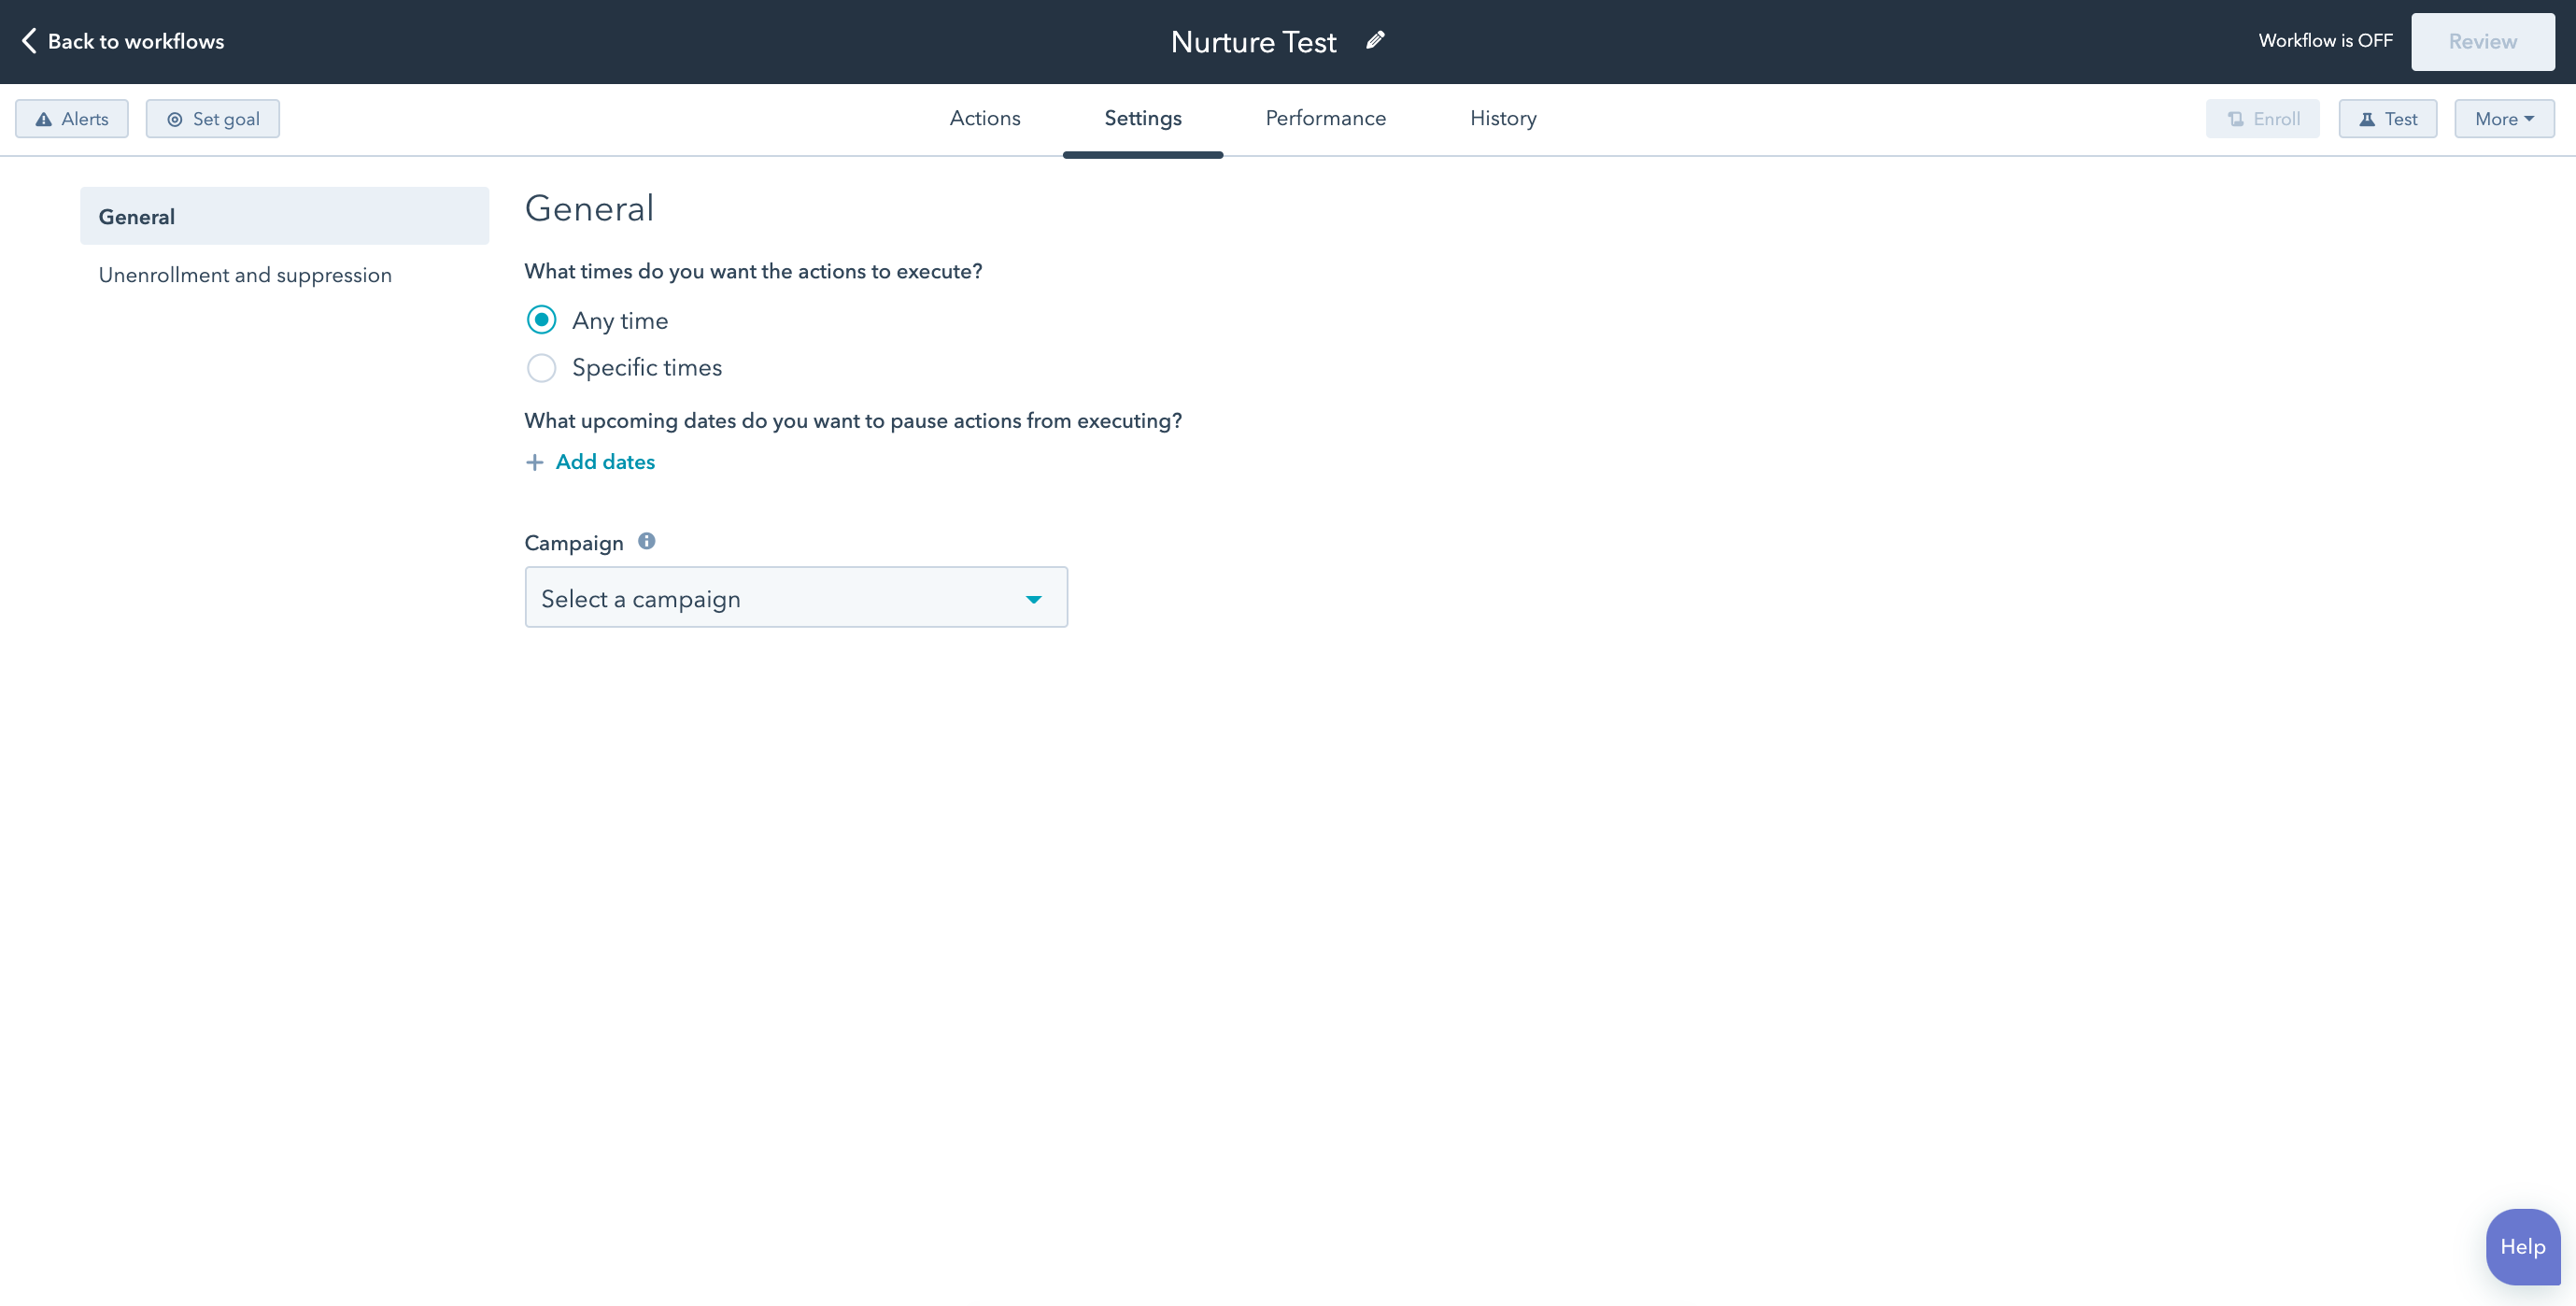
General Settings
These let you see and tweak the times you send out emails to people.
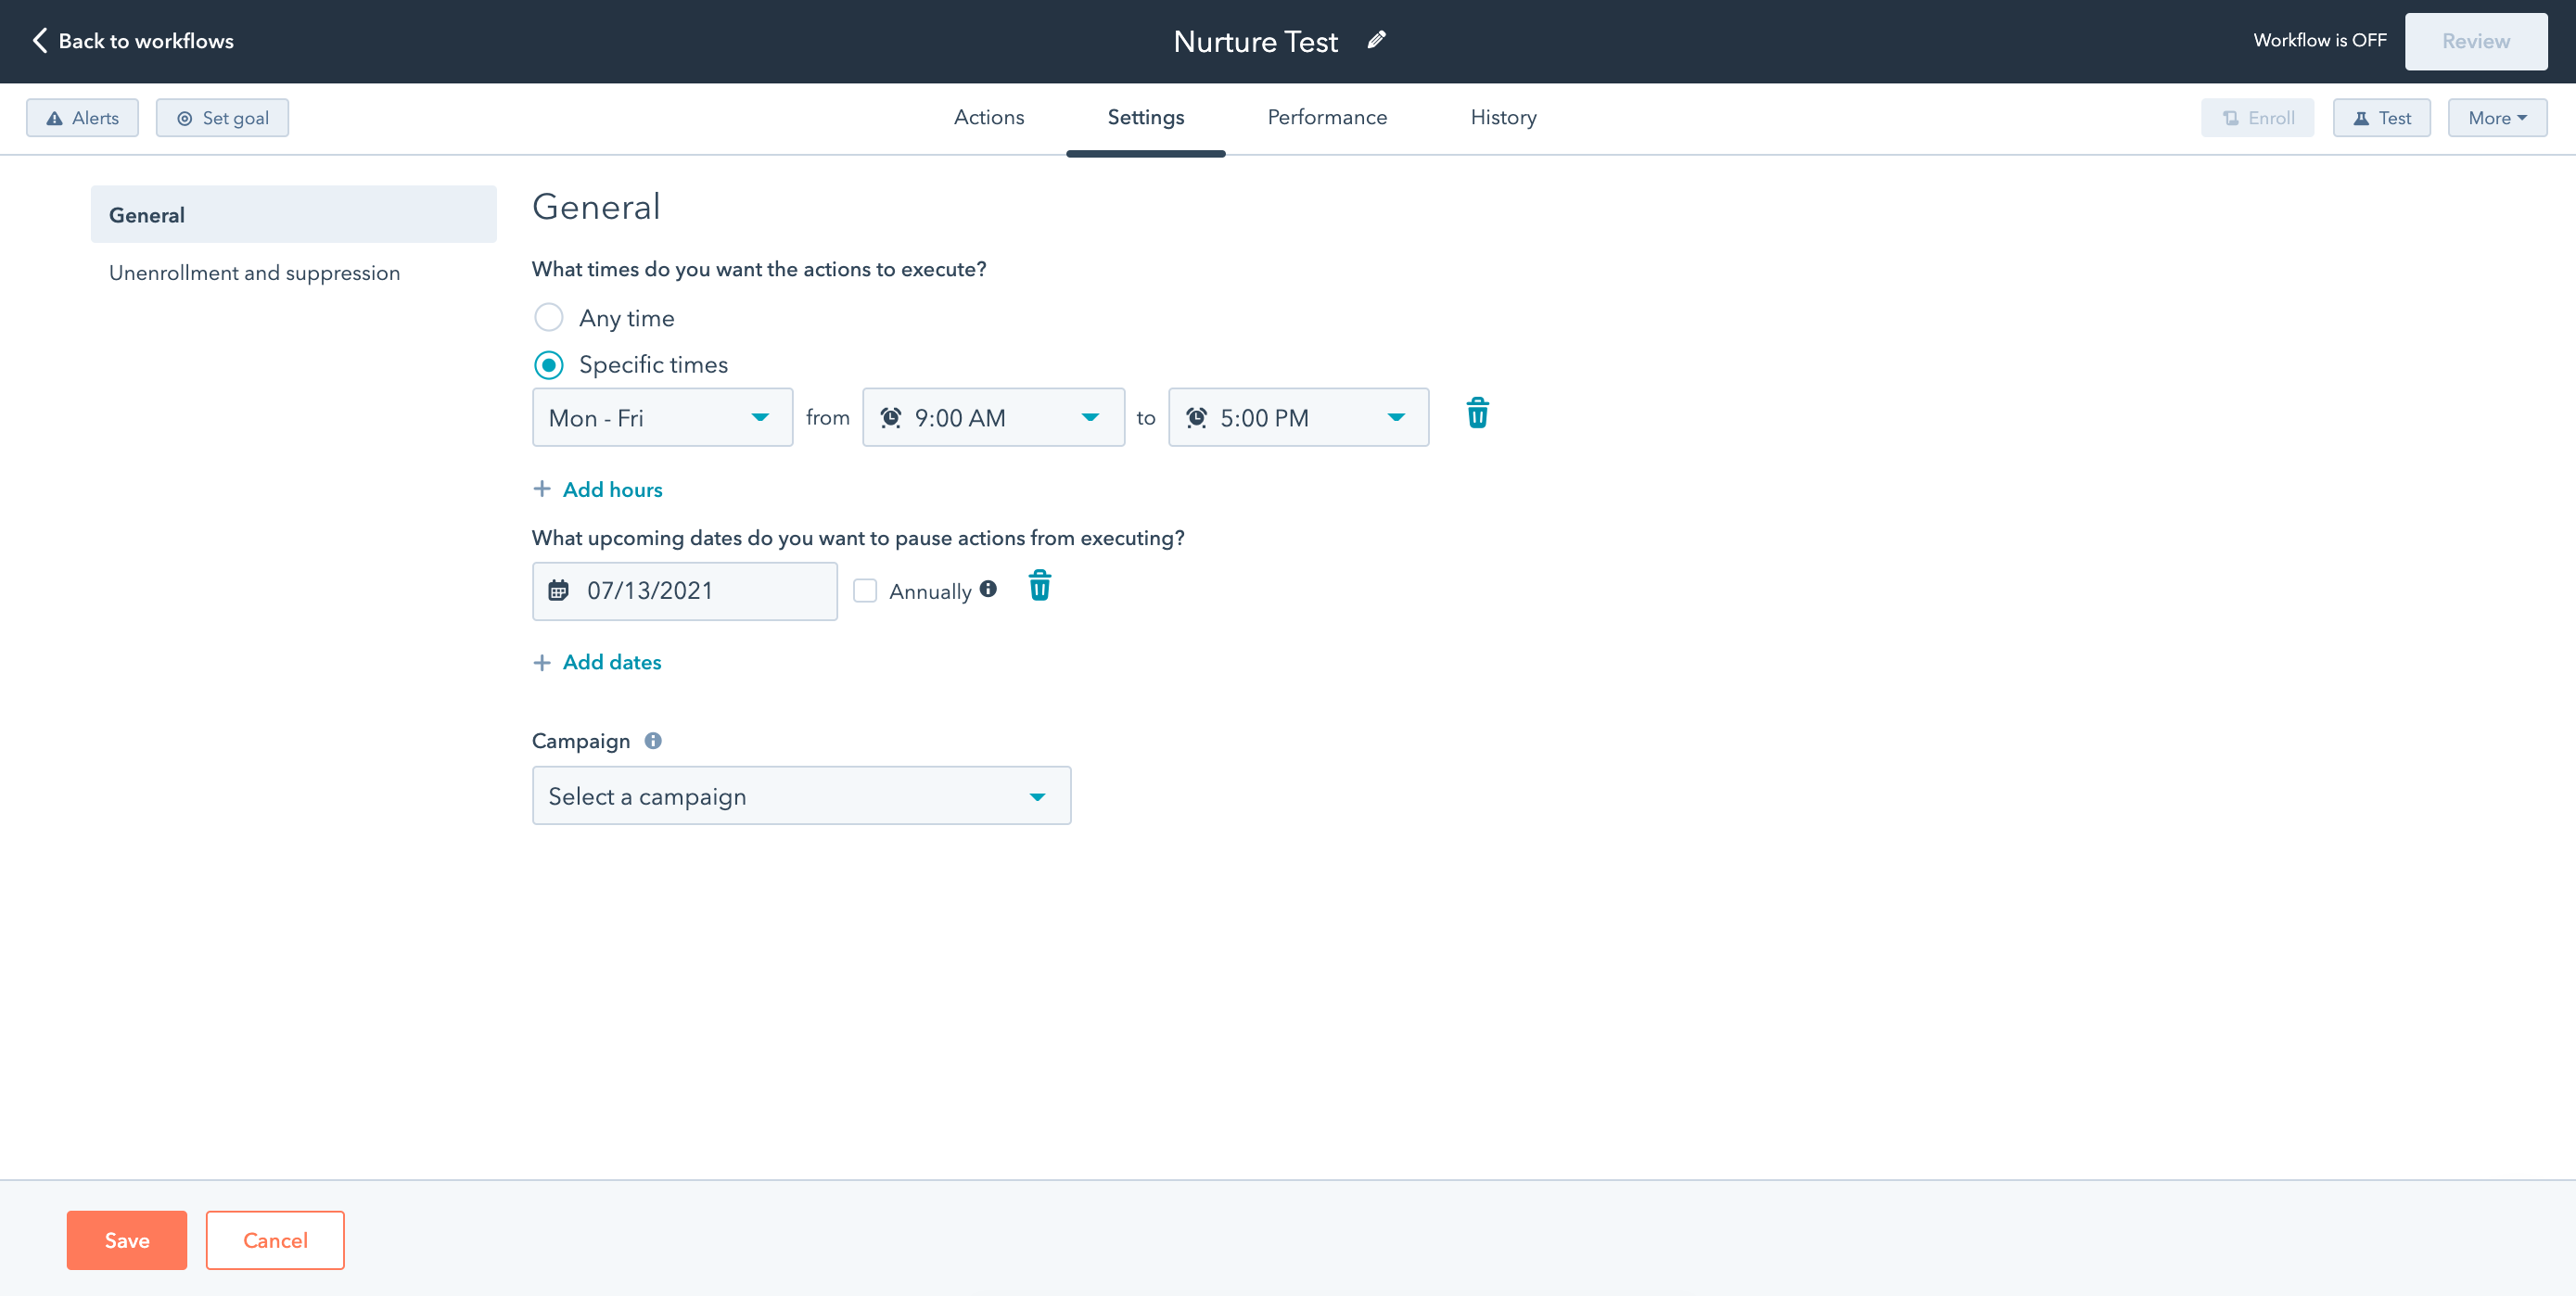
1. Select ‘Specific times’ to have more control over what times the emails are sent out.
2. You can then choose the days and times that would work best for your audience.
For instance, you may pick Monday to Friday during working hours if your audience is most likely to open emails at this time. Or you could change it up and pick weekends to try out a new day and time and measure conversion rates compared to the usual working hours.
You’ll want to play around with the times to see which works best for your specific audience.
3. Pick the Campaign you want the actions to be associated with.
4. Click ‘Save’ at the bottom.
Unenrollment and Suppression Settings
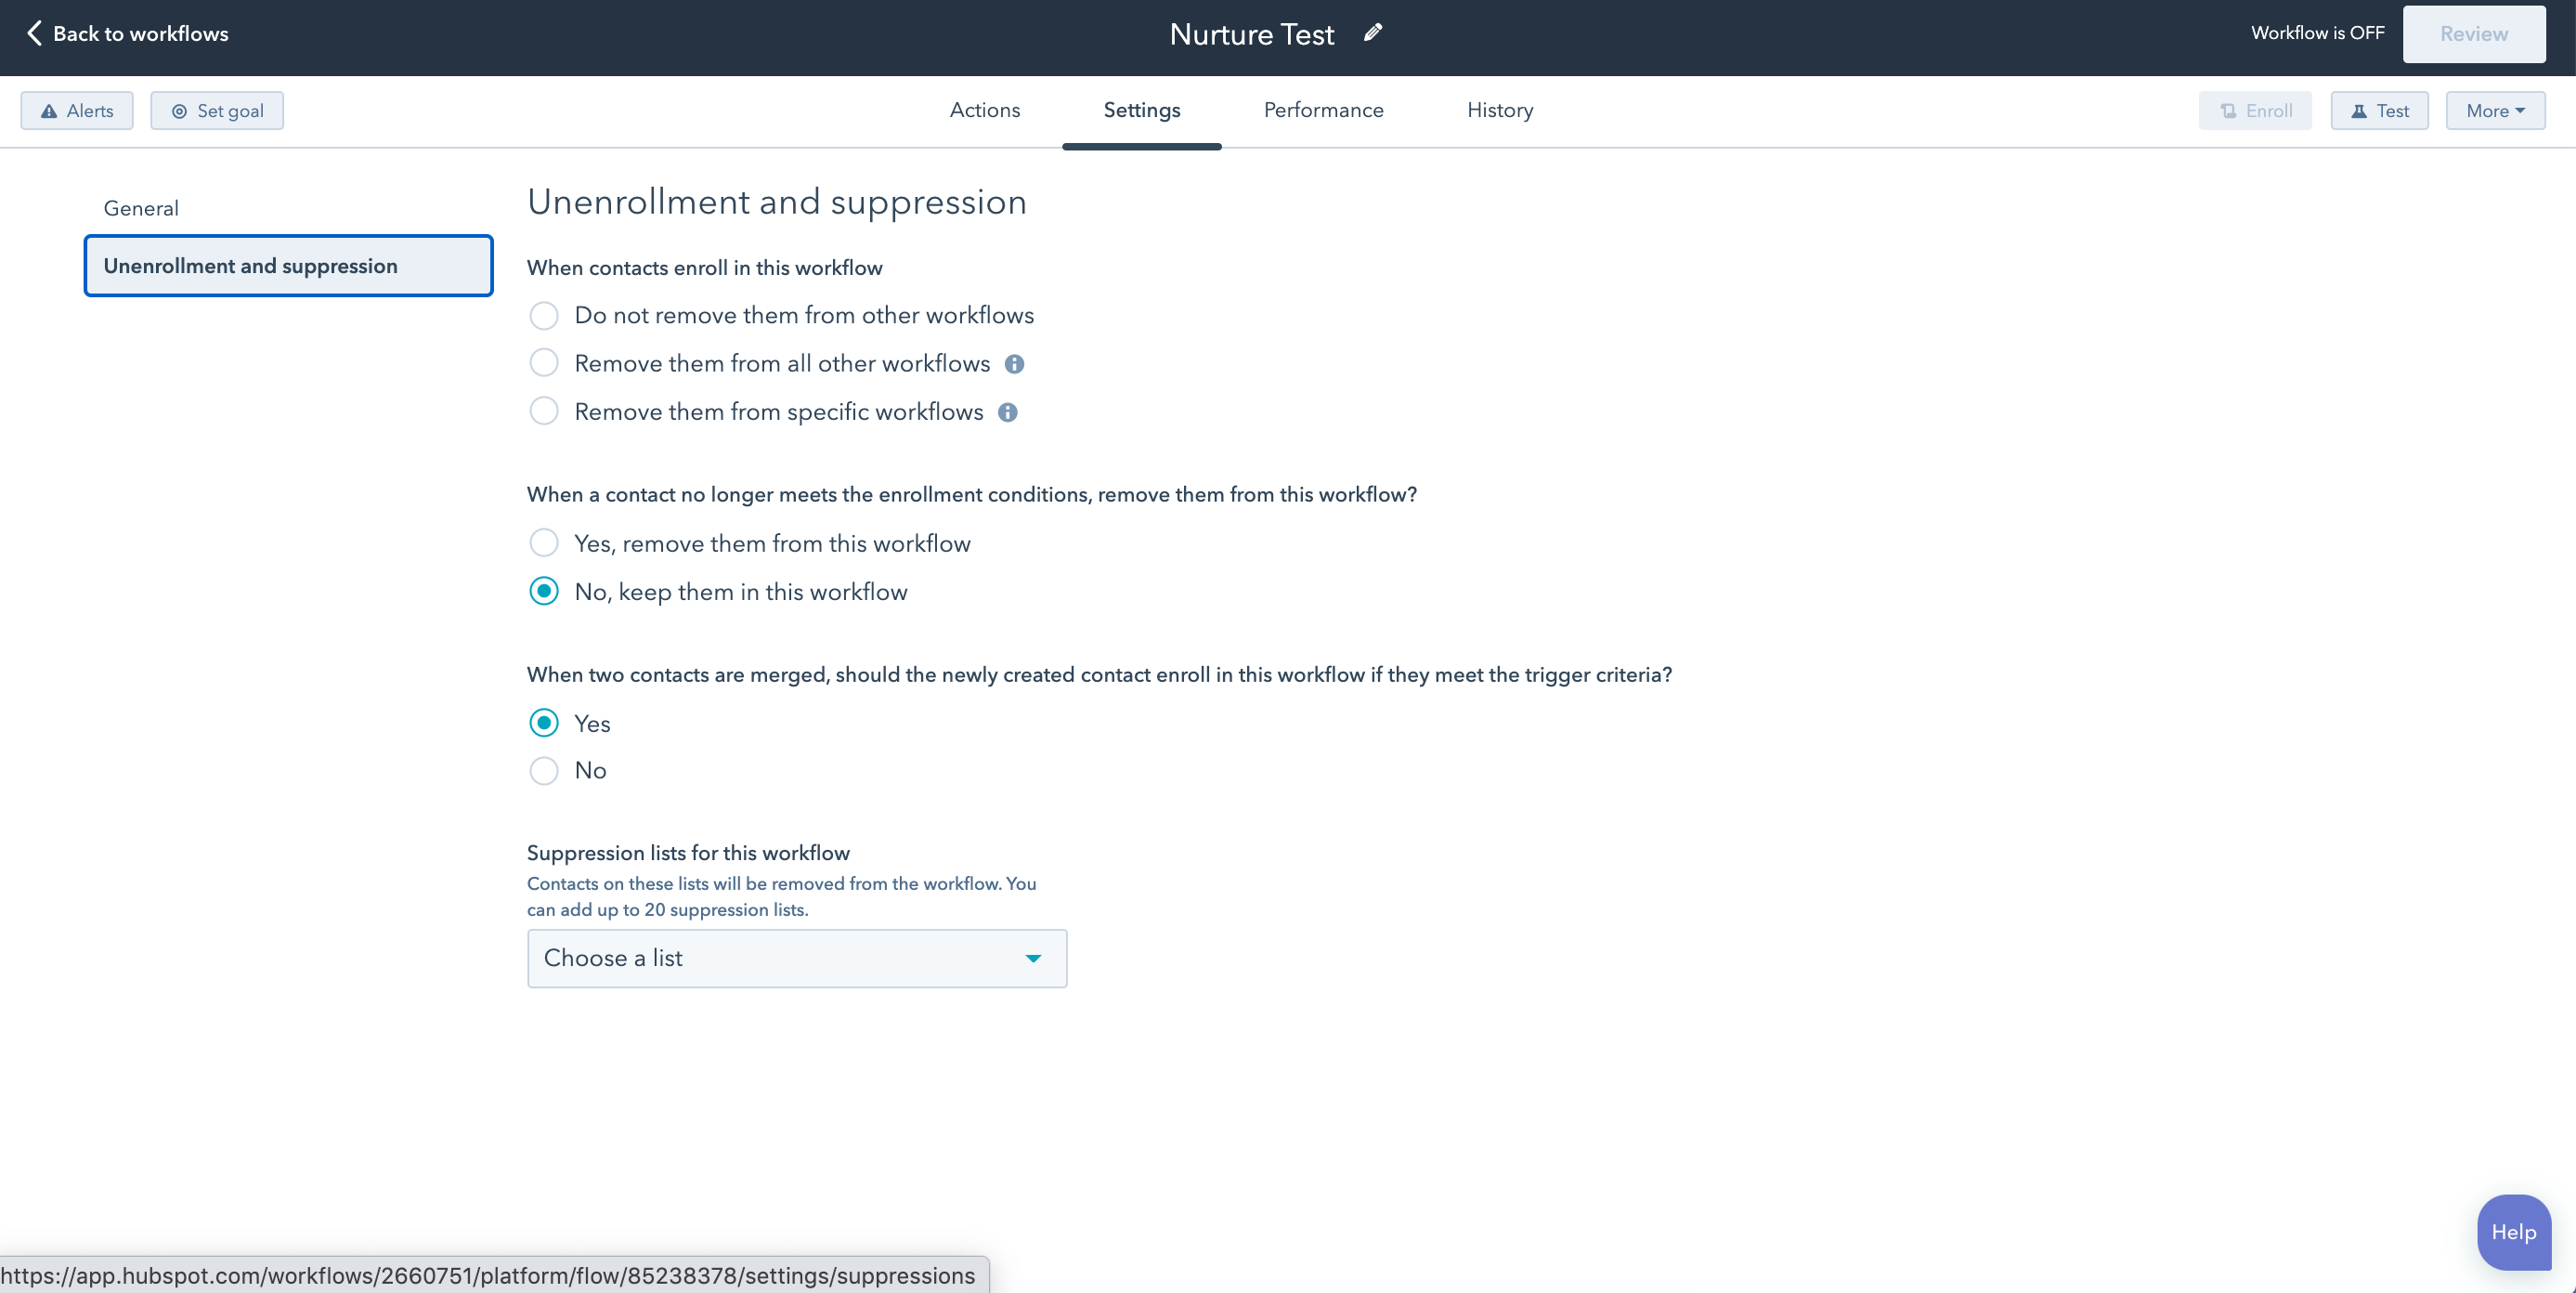
This comes in handy once you have been using HubSpot for a while.
As you create more Workflows, you may end up having your contacts signing up for several things like an upcoming webinar, an ebook, and a checklist.
This could end up with your users receiving multiple emails from you, all from different Workflows.
It may become annoying and depending on the content you’re presenting, it could even be confusing for the recipient. So you want to make sure that your audience doesn’t get too many emails or the wrong content.
Under the Unenrollment and Suppression Setting, you can pick what to do when contacts enroll in a particular Workflow.
Here are a few times you should consider using this setting to unenroll contacts.
When to Unenroll from Other Workflows
- When the other Workflows have content from a different stage in the Sales Funnel. For example, top of the funnel, awareness creating content could clash with middle of the funnel content. In one, it could be educational content in your niche while the other is encouraging people to book a call for personalized assistance.
- When the Workflow’s timing coincides with another one. Avoid showing up in your audiences emails over and over in a day or week.
- When there are just too many Workflows with the same contacts, and you don’t want to bombard your users with emails. Make sure they get only content that is relevant to them.
Finally
You don’t need to do everything at once! Workflows help streamline your process and provide your audience with the right experience. That means you can focus on increasing sales and reviewing your metrics to make your process even better.
Do you use Workflows in a unique way that we didn’t mention? Tell us about it!


